I'll often start a new project full of curiosity about a particular subject and quickly learn what I don't know. I'm generally overconfident when I start, humbled by halfway through, and thoroughly frustrated several times before deciding I've had enough.
In this case, I wanted to combine a few components I was familar with:
ESP8266 + DHT11 + Power = A WIFI enabled weather station to monitor my garden.
Temperature and humidity are the critical data points, so it's no coincidence the DHT sensors provide these values.
Parts List
- NodeMCU devkit board
- DHT11 temperature sensor
NodeMCU - a glorified ESP8266
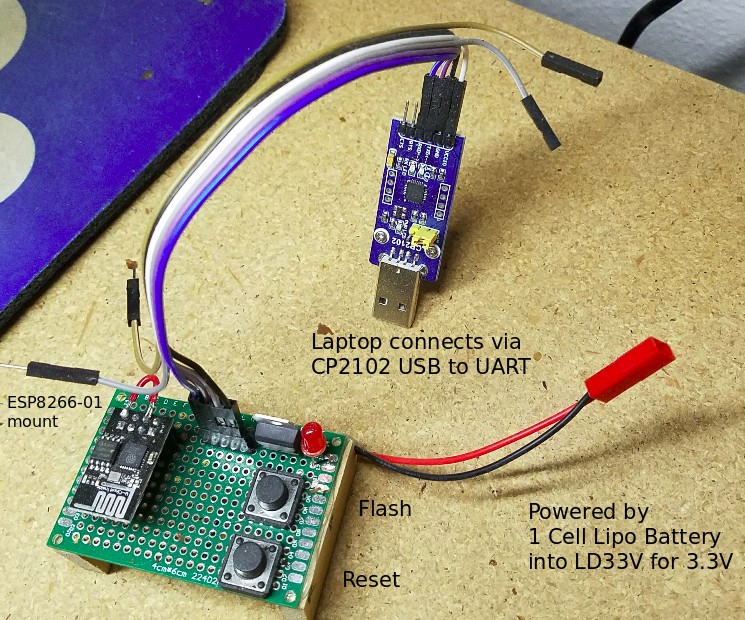
I spent a lot of time messing around with the ESP8266-01, which is a tiny WiFi chip for connecting IoT devices. ( It can be used as a peripheral, or host a limited amount of code on it's own memory and run independently. ) It can operate as a client or AP, and it can host a basic web server / service. Basically it can satisfy the needs of a simple IoT device.
What's wrong with the ESP8266-01?
It's tinyness/cheapness brings a few challenges to deal with. I'll gloss over them here:
- No USB interface, meaning
- no onboard UART ( you can't flash via USB )
- no powering with USB
- Limited I/O pins, no hardware buttons for reset or flash
- Non-standard header spacing, requires building a custom jig for flashing ( won't fit your breadboad )
- No physical access to the RST pin
It's actually the final point that became the issue in this project. When we get on to talking about 'deep sleep', it will be apparent why having access to the RST pin is necessary.
This is a pain in the ass.
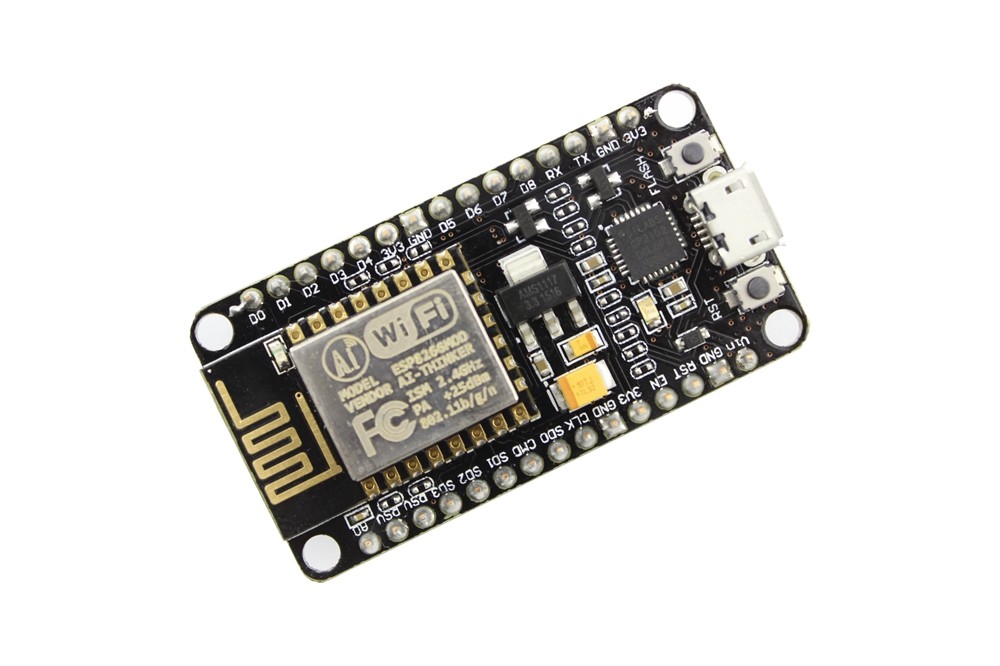
Hello NodeMCU devkit board
For a significant increase in price ( about $10 compared to the -01 at rougly $3/each ), all of the above concerns are addressed by using a popular ESP-based development board called the 'NodeMCU devkit board'. By comparison, using this thing is a breeze.
PlatformIO
I've been trying to learn about alternatives to using the Arduino IDE for all my MCU flashing needs. This is when I encountered PlatformIO, which is a command line utility for managing projects, dependencies and toolchains for embedded devices.
Oh yeah, it also handles the flashing. Being able to flash from the command line makes me feel like a grown up. More importantly, it means that these steps could be scripted and automated.
This also allows me to use a headless machine for flashing, because it won't always be practical (safe?) to put that burden on my laptop. Using pip, it was easy to install PlatformIO on a Raspberry Pi 2:
$> sudo pip install -U platformio
Then, such amazing things are possible:
// compile current project
$> platfomio run
// flash to device
$> platfomio run --target upload
It automatically detects the connected device and it's baud rate.
// search for libraries by keyword
$> platformio lib search DHT11
// ... lists lots of libs ...
// install a library from the manager by ID
$> platformio lib -g install 1671
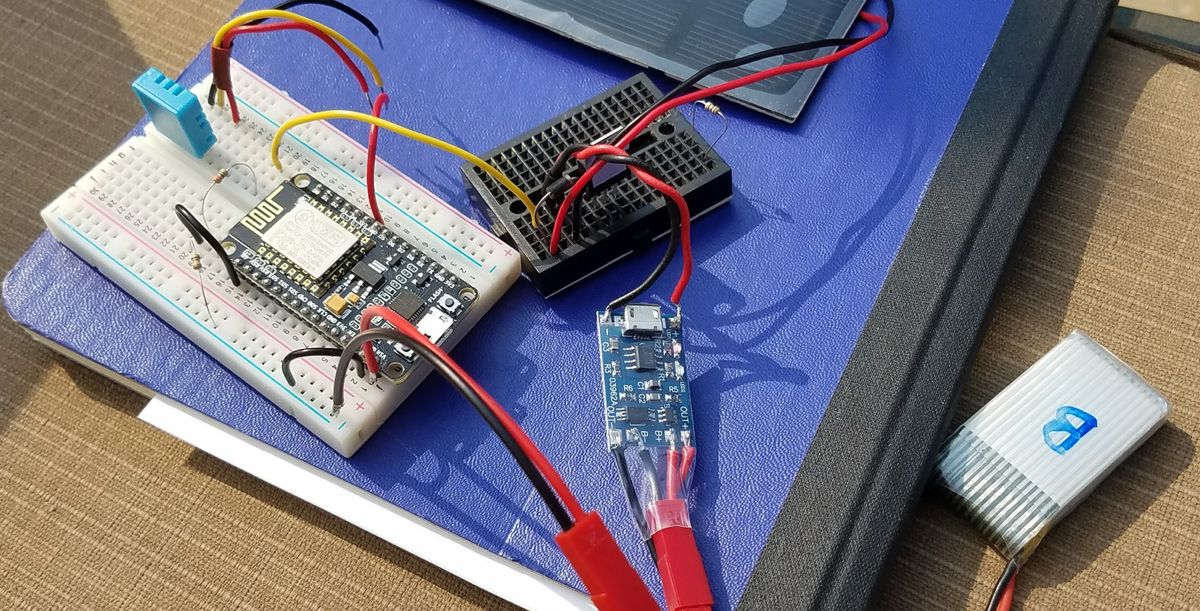
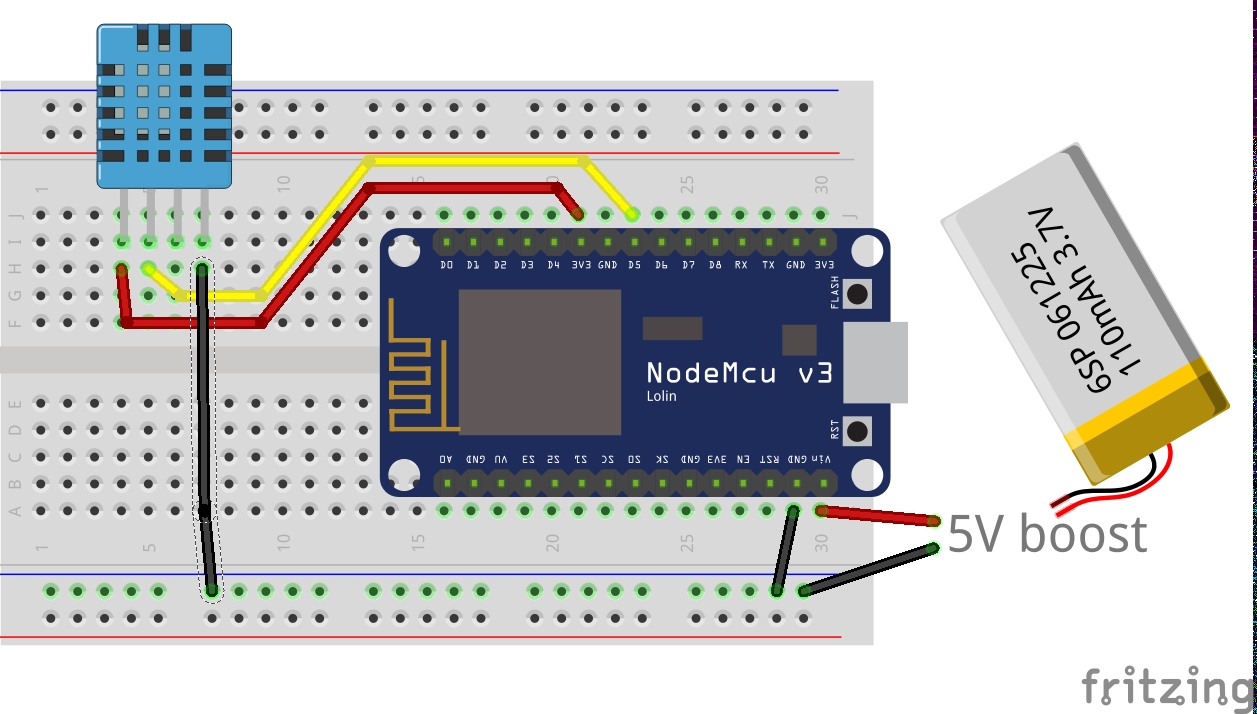
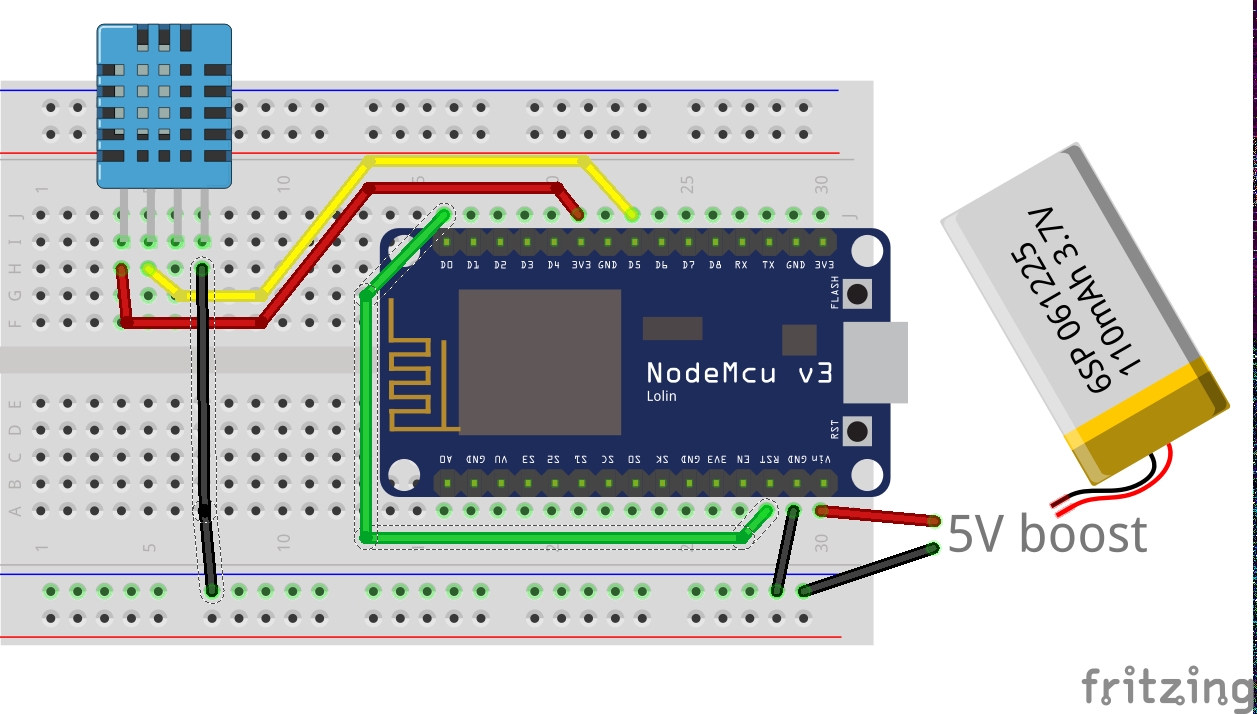
Wiring it up
At it's core it needs to read the temperature from the DHT11, use a wifi connection to report or serve this data, and run on battery power.
The Power Struggle
NOTE: The ESP8266 has unique power needs, specifically that it's consumption will 'spike' momentarially when firing up the wifi radio. The trouble is that this spike can be significant enough to brown out the whole system. This can be a frustrating situation to troubleshoot. In other words, you need a real power supply to do real wifi stuff.
The PC's 5V power supply via the USB cable works for flashing the firmware, but will be unreliable for actual wifi chip operations. If you need to debug via the serial port ( USB connected ), an alternative source of 5V can be provided into VIN.
I still don't know that it was the right choice, but I'm using single-cell Lipo batteries as my power source. I have to boost the 3.7V to 5V, but sticking with a single cell makes battery charging simpler.
Starting Simple
The NodeMCU board takes 5V input, so a boost module is used to take the voltage of the lipo cell up to 5V.
A pseudocode example of reporting out temperature:
main() {
    float tval = dht11.getFarenheit();
    ESP.get('http://example.com/?temp='+tval);
    delay(60000);
}
The Backend
So because this is 'IoT', we're just blasting everything out to some endpoint on the internet. No problem, you could roll your own solution to this... but then, what about an auth token, a database, a web GUI, ughhhhhh... These sound like problems that have been solved before.
There are lots of free cloud logging platforms competing for you business. Besides providing auth tokens, they provide the logging, API, dashboards and even widgets. Everyone loves widgets.
I came across Dweet.io, which makes it really easy to setup endpoints for devices. So that GET request would actually look more like:
https://dweet.io/dweet/for/my-iot-weather-project?temp=55.50&humidity=45.00
In the future I would like to put on my big boy pants and do all of this with MQTT. I feel like MQTT commands more respect. I played around a little with LogDNA, and really liked their log query UI. In the future I would like to give both AWS and Graylog a shot.
Wireless Power - The Long Game
So how long does a battery last doing this? In this case it depends mostly on the delay() interval because the wifi consumes most of the power. It's not as efficient as you would hope. With a lipo in the ballpark of 1000mAh it will be in the range of hours, and not the mythical days/months/years.
Getting Deep
Unfortunately, a lot of power is still being wasted while everything is just 'delaying()'. This is where deep sleep comes into play. There are two power saving states that disable the wifi radio to different extents.
I think it's misleading because 'waking up' from deep sleep is basically rebooting. To be really clear - the code does not resume execution from the point where it went to sleep.
To 'wake up', the RST/Reset pin needs to be pulled LOW. The chip can do this itself via a wire connected to D0.
The new green wire makes the wake-up call to RST.
The difference in the example sketch is subtle. The main loop only runs once and then takes a power nap.
main() {
    float tval = dht11.getFarenheit();
    wifi.get('http://example.com/?temp='+tval);
    ESP.deepSleep(1_hour);
}
It starts all over again from the top when waking up.
A Battery Eventually Needs a Charge
Even with the most optimized use of power, at some point the battery will need to be charged. You're thinking what I'm thinking right? S-O-L-A-R? This sounds like a great excuse to learn more, and an excellent point to punt to the next article in the series.
The next article will include my introduction to solar cells and charging lipo batteries with the TP4056. What started as monitoring temperature evolves into monitoring battery charging.