For the last two growing seasons, I've experimented with making time lapse videos of my plants sprouting.
It's an easy setup to leave in place for several weeks, and being indoors I can control the lighting.
The first few attempts were decent, but there were still a few issues. Here is an early example
Exposure Consistency / Strobing
The first and most obvious issue is the inconsistent exposures, which when compiled result in the 'strobing' effect. I'm assuming that these intermittent, overexposed frames are due to the operating frequency of the florescent bulbs.
My theory is that the exposure value determined by the webcam's autoexposure is inaccurate by the time the actual exposure is created. ( Theoretically this would generate as many underexposed frames, so it's just a theory. )

My cinematography teacher in college used to say, "Overexposed video looks like a hole in the screen."
If I were able to set a shutterspeed for the webcam, I might be able to address this by using shutterspeeds compatible with the 50/60hz frequencey. However, I already had another solution in mind...
DSLR - A Real Camera
In a recent post I showed how I setup my old Canon 300D with a Raspberry Pi running gphoto2. I was curious if I would see the same issue of inconsistent exposures when using the DSLR.
I figured that a relatively slow shutter speed would better 'even out' any high-frequency strobing the lights might be doing. Given my lighting setup, I found 1/3 second produced a nice exposure.
The underappreciated consistency of a real camera
Other benefits of using the DSLR include:
- Any/All manual camera adjustments
- Increased Resolution - I think I have enough pixels in this old camera to make 4k video
- Real Lenses - higher quality in general
- Interchangeable Lenses - for more variety in perspective
SETUP
Hardware:
- Digital Camera ( compatible with gphoto2 )
- Raspberry Pi - I'm using a model 1B
- SD card with sufficient storage ( 8-16 GB recommended )
- USB cable ( camera to pi )
- Power supply for camera - ( this is going to vary depending on your camera )
- Another (faster) computer to compile the timelapse ( my instructions are using Ubuntu )
Software:
- gphoto2 ( on the Raspberry Pi )
- libav-tools - specifically avconv ( on the processing computer )
Optional but Recommended:
- Tripod
- Wifi Dongle + openssh server ( otherwise you'll need keyboard and monitor on the pi )
- something interesting to time lapse
CAPTURE
Once everything is in place ( including lighting ), I took a few test shots to get the exposure and depth of field I was looking for. I found f8 and 1/3 second produced a nice exposure with my lighting.
In preparation for automating this process, I created a short bash script to move to the output directory and run gphoto2 with the 'capture and download' flag.
#/bin/bash
cd /home/pi/timelapse1
sudo gphoto2 --capture-image-and-download > /dev/null 2>&1
The interval you choose will vary based on your subject. I settled on every 5 minutes. So the crontab reads like this:
*/5 * * * * sh /home/pi/timelapse1/dslr_capture.sh
At this rate I can see the slightest bit of growth between frames, but really it might be overkill depending on the framerate of the output video.
Once satisfied that I had enough captured images, I moved them to a faster computer to do the video processing.
IMPORTANT: If you're planning on using the renaming script I show below, be sure to preserve the original creation timestamps of the images.
I used rsync:
rsync -avz pi@192.168.1.242:/home/pi/timelapse1/ ./
The reason the files need to sequentially renamed is that the filenames Canon cameras output aren't going to work for avconv.
RENAMING
Since I'm no bash professional, here is how I accomplish renaming all these files. This script sits in a directory with two directories named 'input' and 'output'. ( The source images are in 'input' )
#!/bin/bash
# define a counter
i=1;
# setup a temp file
temp=$(mktemp -p .);
# setup a loop - (ls -1rt for reverse time sorted filenames, one per line )
for file in $(ls -1rt input); do
# copy (or move mv) the file from input dir into the temp file - copy is safer
cp input/"$file" $temp;
# move file to final location in output dir with 5 digit, numeric filename
mv $temp output/$(printf "%0.5d.jpg" $i)
# increment the counter
i=$((i+1))
done
Sweet. Now all my renamed files are in the 'output' directory, named like 01234.jpg, 01235.jpg, etc.
PROCESSING
For the processing step I'll be using a faster computer. I needed to install libav-tools.
sudo apt install libav-tools
There are a lot of options to pass to avconv, and I'll be honest, I don't recall what all of them are doing here.
This is all my notes say on the subject:
-r xx is frames per second of the output - so 30fps is prob good
-g is 'group of pictures' size - not sure
So let's get to the point. This command compiles images into an mp4:
avconv -r 60 -i %05d.jpg -r 60 -vcodec libx264 -crf 20 -g 6 -vf scale=1280:720 compiled.mp4
You'll notice that the framerate command is being passed twice. I read somewhere to do that, though I'm not sure it matters.
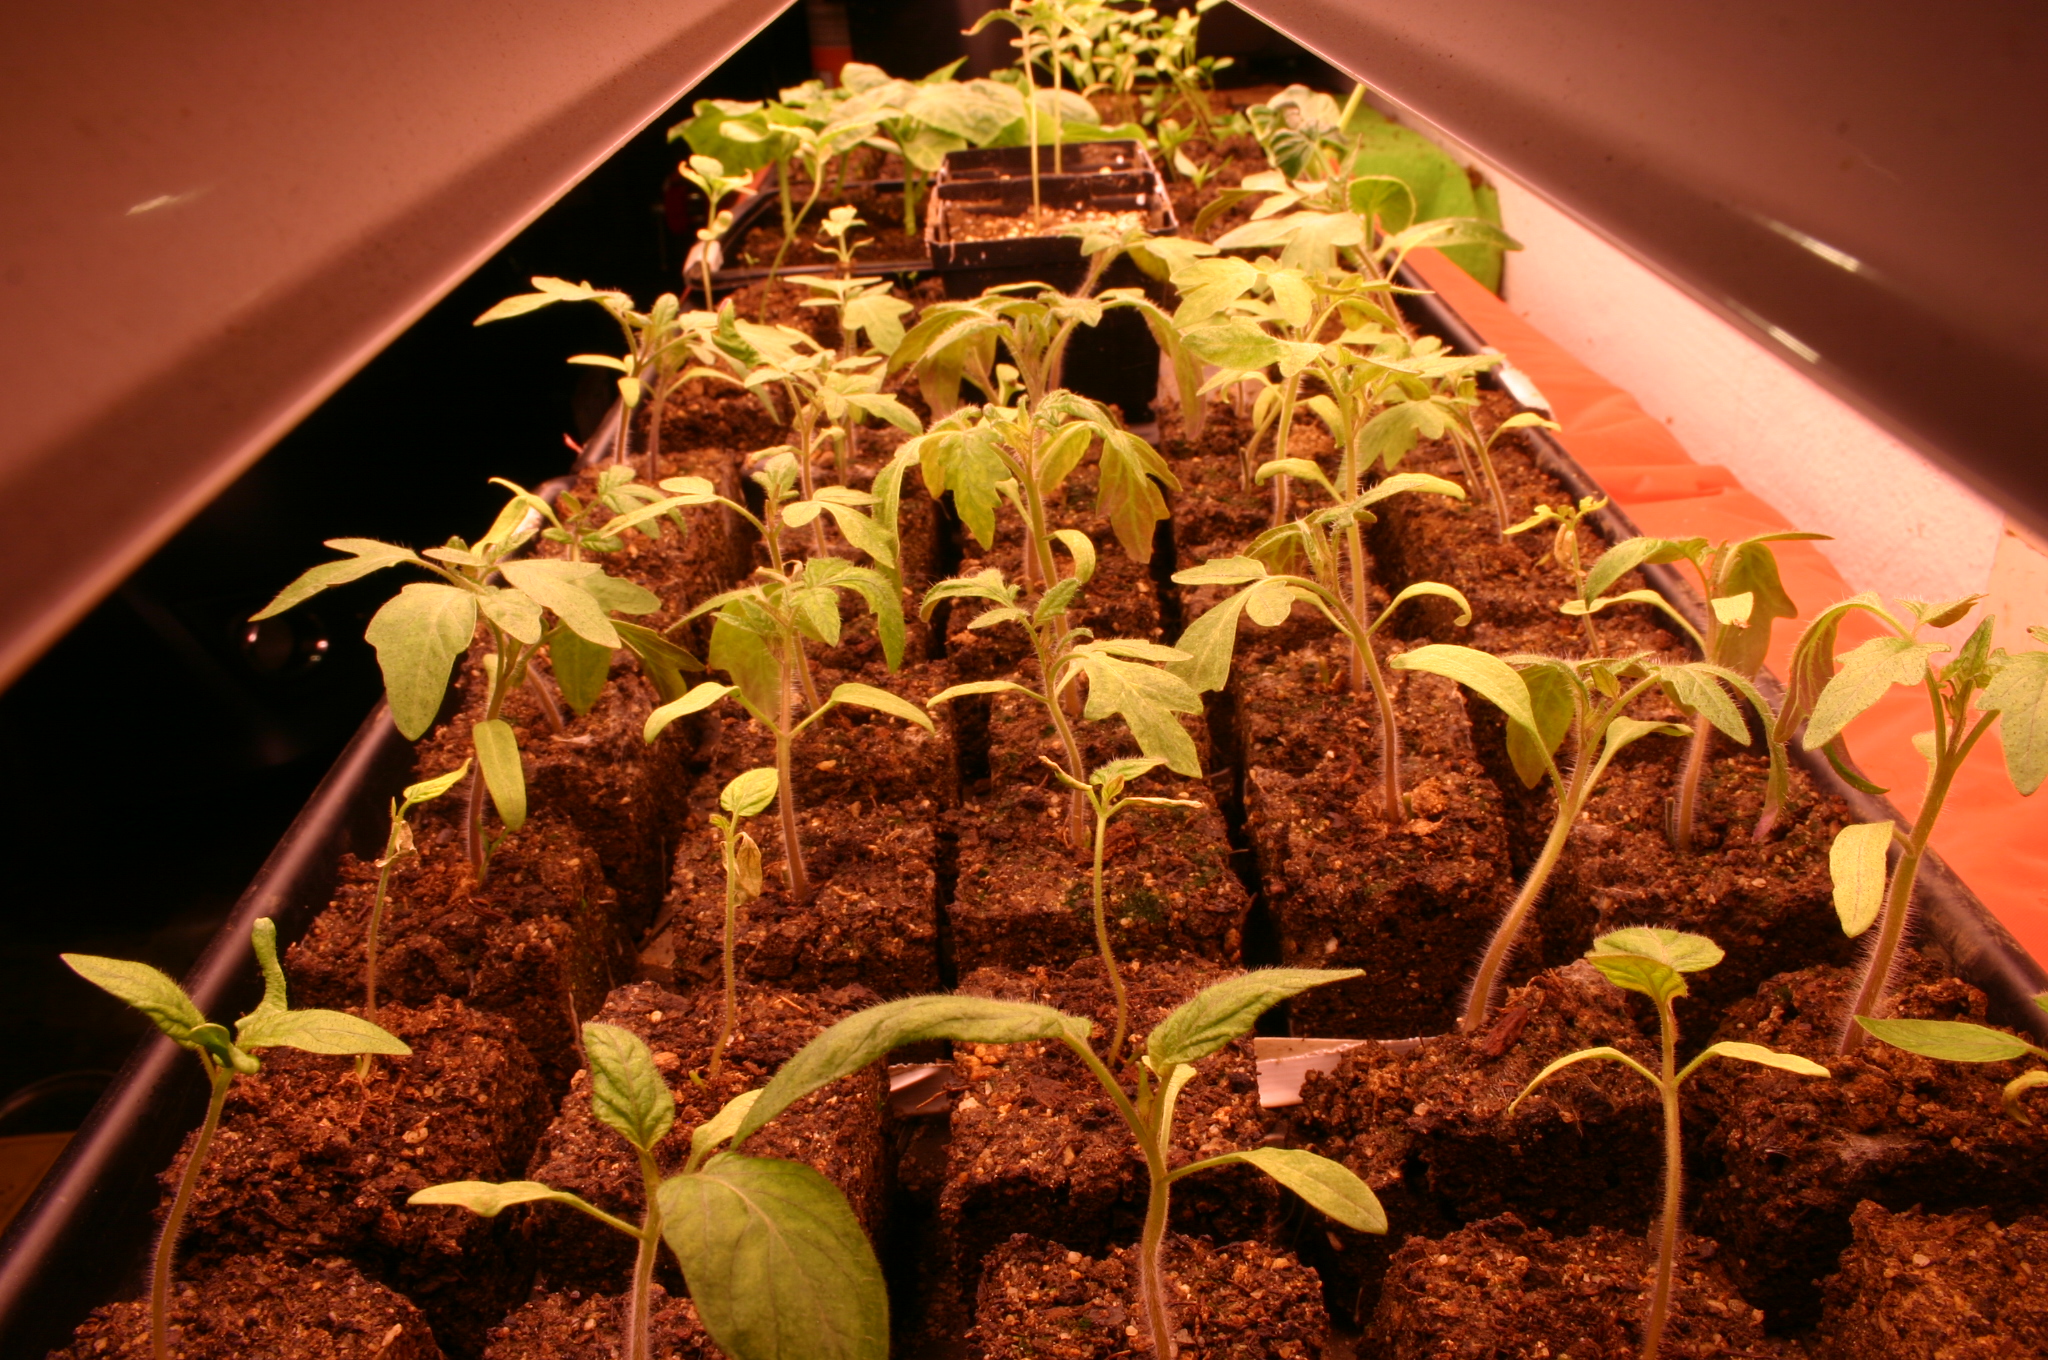
The result is a beautifully exposed timelapse:
And some cucumbers:
CONCLUSION
I know, it's a fairly barebones way to generate a time lapse. However, it is totally open source and open ended. This basic setup can be modified to work with a variety of cameras, framerates, resolutions. The next experiment might be some kind of motion control?